
To continue the tradition of my blog posts being about how I set up this blog, here’s a post of how I’m managing to upload images to my blog; exciting stuff.
On the server where I host my blog I have a directory set up (/data/blog/files) for storing and serving files with Caddy. This is all pretty simple and works well enough. However, I wanted a simple way to add files from my iPad when writing a new blog post.
There’s a great app for making a remote SSH server appear as a location in the Files app called Secure ShellFish. I’ve got it set up and it works as advertised. However to upload files you do need to pay for the app, which is understandable. If you don’t pay for the in-app purchase, you get a regular notification advising you need to unlock the app before uploads work.

While I intend to buy the app this seemed like a good time to play around with something I’d been meaning to try for a while.
Enter Rust Link to heading
I won’t bore you with what Rust is (feel free to check out the site for more details) but given:
Rust held the top spot for most loved technology for the fifth year in a row. - Stack Overflow 2020 Developer Survey
I thought I should give it a try. There’s also one individual I know who has been proselytising Rust for a while and I trust his developer instincts (and I hoped me trying it out would give me something to troll him about).
What to do with Rust Link to heading
Rust seemed like a good candidate for a simple web server that would take POST requests and drop files in /data/blog/files.
I played around with actix-web who happened to have an example that showed what I was after. I copied the code and had a web server that dropped files in a specific directory. Working as expected.
However I wanted to extend the server to take configuration values (where to store the files, a token to stop unauthorised uploads). This meant I needed to play with ownership and lifetimes. This meant several frustrating hours which as I understand it is normal for beginning Rust developers.
At the same time I ran into the problem that the docs for actix-web may not be the best (confirmed by others and not just me being a Rust noob). There seemed to be several different ways to do everything in the framework and each example did things a little differently. It made trying to work out what was ‘best practice’ impossible.
Eventually I did get it working. It’s now deployed to my server and powering my blog post workflow (this being the first post I used it for). If for some reason you would like to see what beginner Rust code looks like, you can view my (likely terrible) code on GitHub at uploadserver.
Uploading from iPad Link to heading
Once I had the server side done I needed to get the iPad talking to the server. Truth be told I had this part working before the server was done. My upload shortcut looks like this.
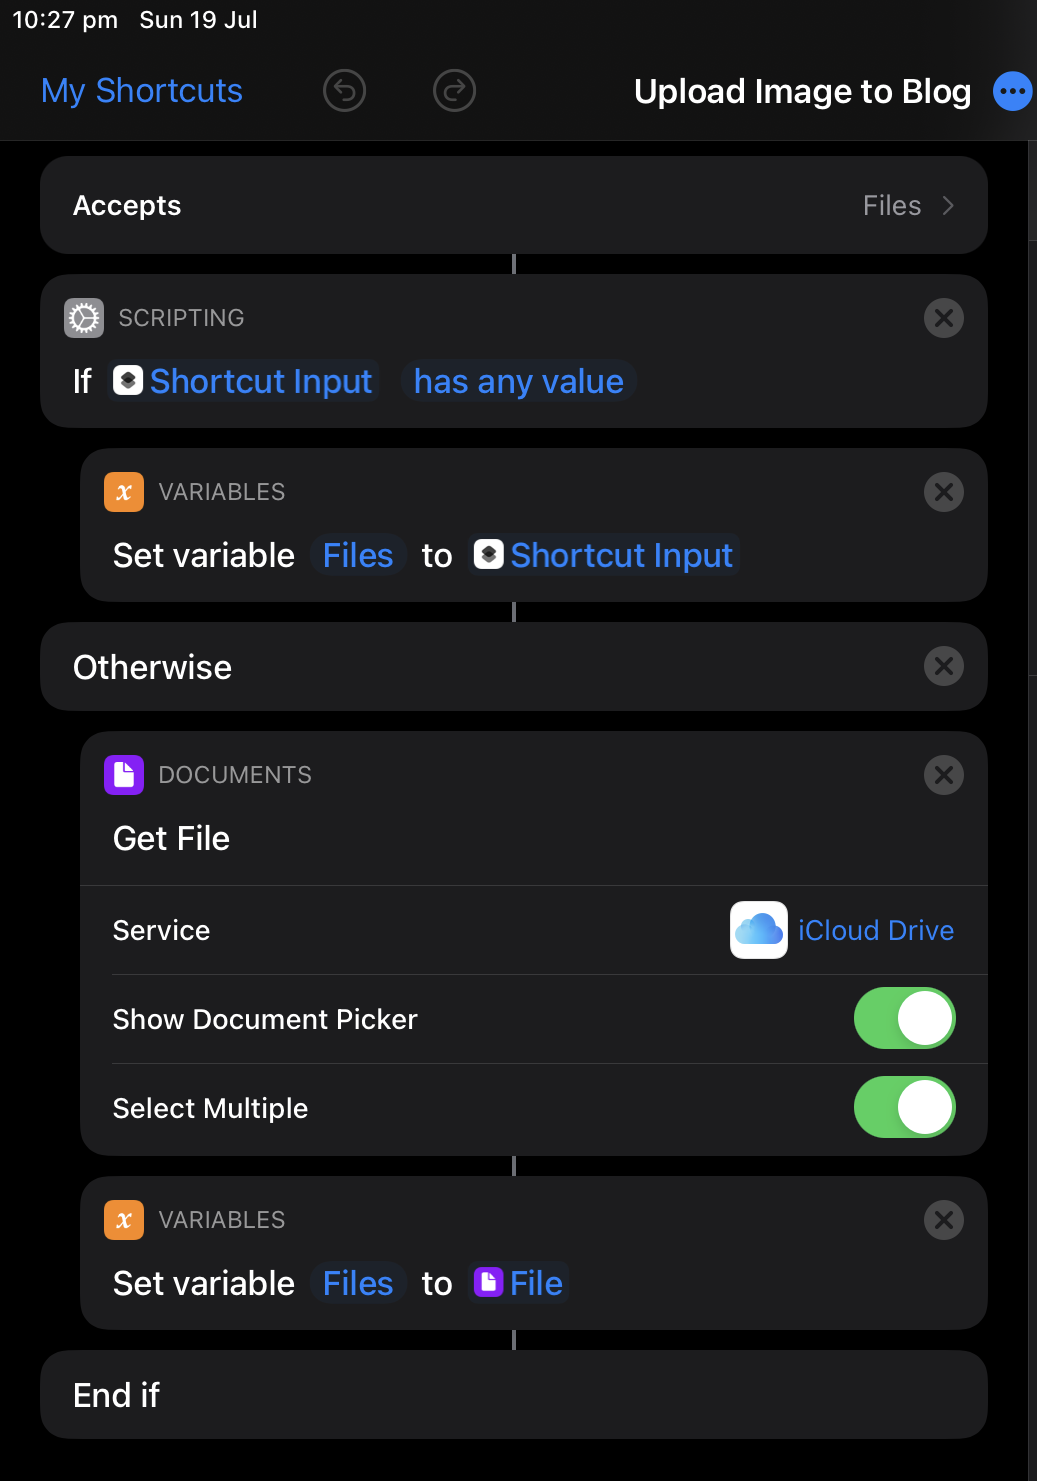
This part of the shortcut:
- Takes in the selected files if run from the Share Sheet
- Otherwise asks me to select files to upload
The shortcut can take multiple files but I haven’t actually used that feature…
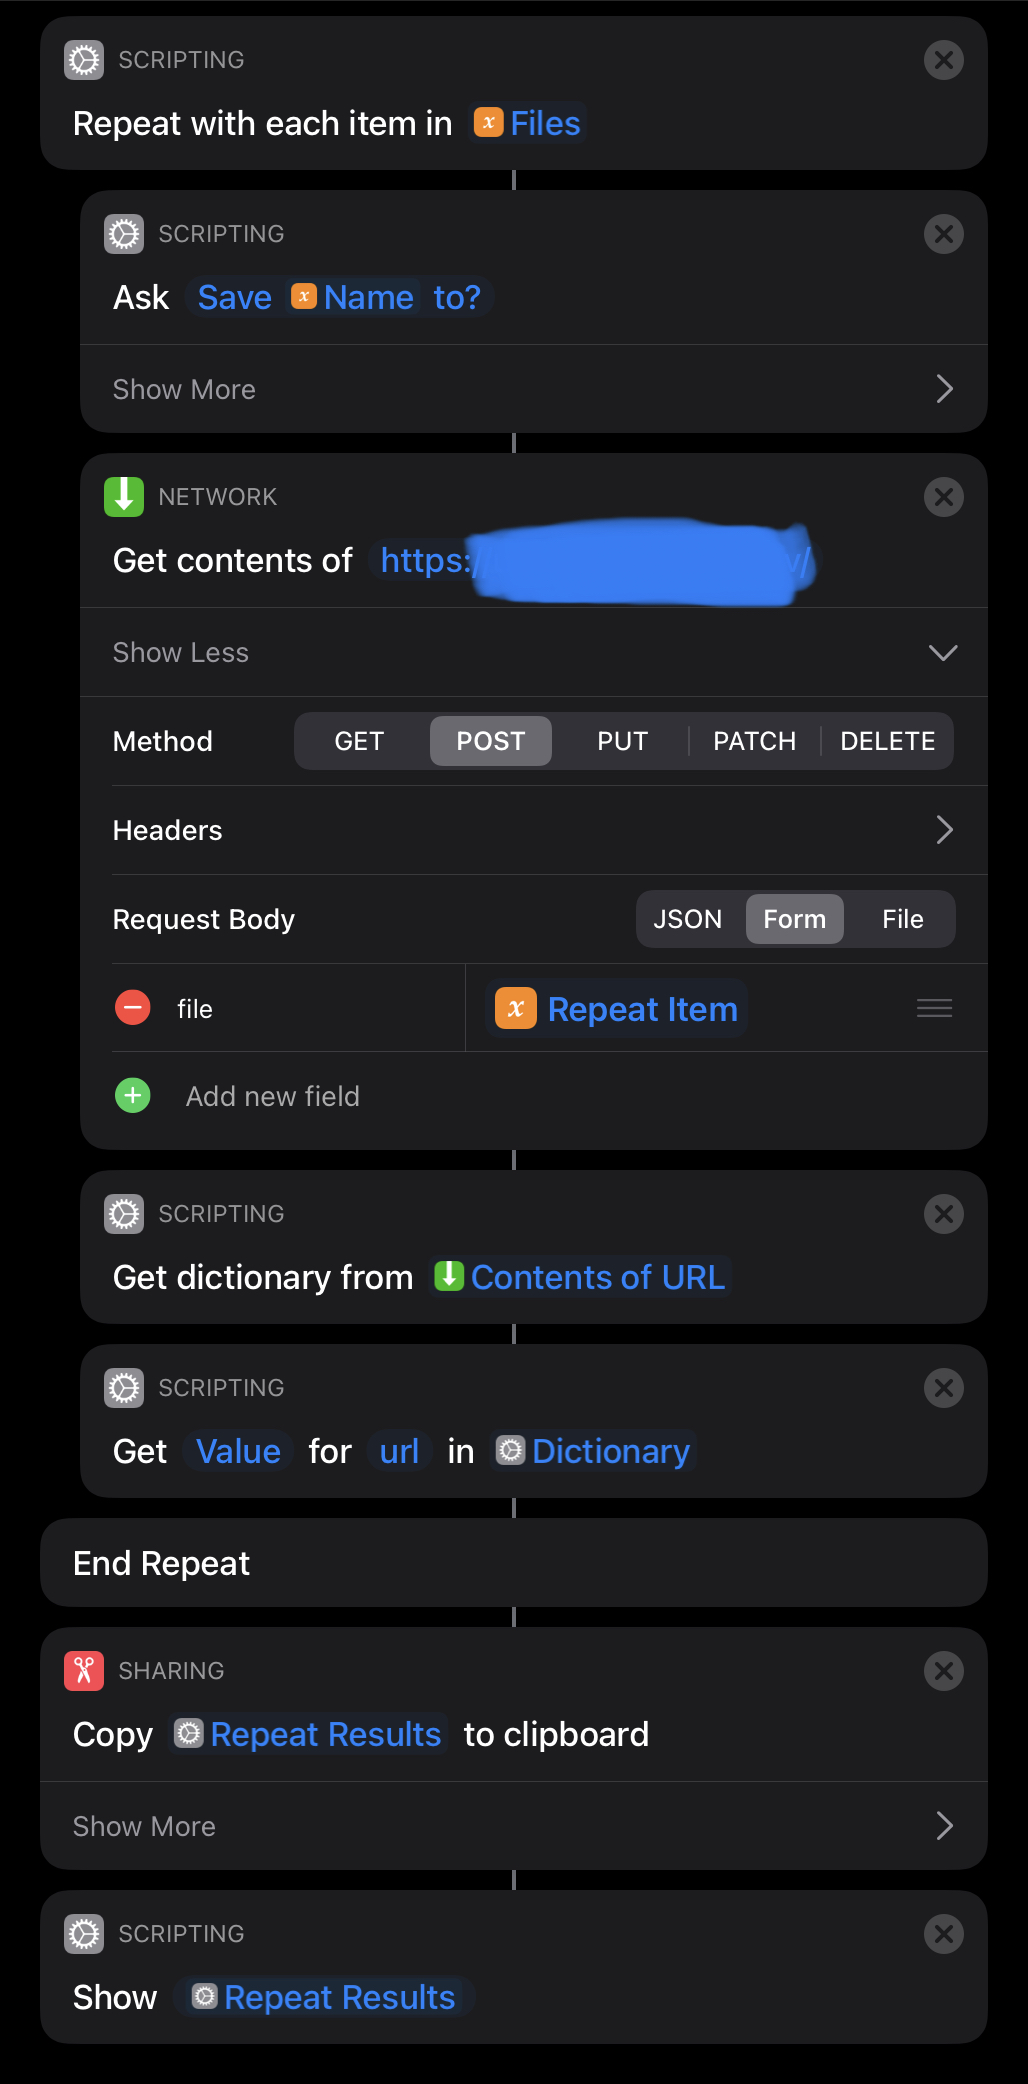
The second part of the shortcut:
- Loops though each file
- Asks where to upload the file to (
TODO: I could make this better by reading a list of posts and auto filling text so there’s less typing and less room for error) POSTs the file to the server- Extracts the URL for the image from the
urlkey in the JSON response - Adds all the URLs to the clipboard so I can paste them into my post (
TODO: should probably make these Markdown image links)
I’ve used this Shortcut several times while writing this post and I’m happy with it at this point. I’ll most likely make tweaks in the future but for now it works.
What about Rust? Link to heading
I’ll have more to say about Rust in the future. I don’t feel like I have much of a handle on it after my short project. I will go back through The Book now I’ve had a chance to write Rust code. I’m assuming everything will make more sense on the second read through.